Features
Step types: 3D, Image, Text, and Section
Choose between 3D Step, Image, Text, and Section items to add photos, warnings, and phases to a clear assembly procedure.
Some features on this page are paid. They are marked with a notice like this one right under their heading, so you can tell what works on the Hobbyist plan and what needs an upgrade. See Plans and limits for what each plan includes.
- Audience: Authors whose procedure needs more than just the 3D model.
- Before you begin: The editor is open and the procedure has at least one item.
- Starting point: The Steps panel is visible.
- End result: Photos, explanations, or grouped phases placed right where end users need them.
Choose the right manual item
Manual items are the building blocks of a procedure. At each point in the job, add the item that fits what the end user needs right then:
- 3D Step shows an assembly state with a title and instruction. Use it when the end user needs to find, install, remove, inspect, or handle a part.
- Image adds a supporting visual, like a detail photo, a diagram, a warning, or a reference picture.
- Text adds an explanation that doesn't need a 3D view, like a safety note, a definition, or a short introduction.
- Section groups related items into a named phase, like Preparation, Assembly, Inspection, or Maintenance.
If your procedure depends on the CAD assembly, start with 3D Steps. Then bring in the other item types where they make the instructions easier to follow. They're there to help, not just to make the manual longer.
Add an item
- Open the Steps panel in the editor.
- Select Add manual item.
- Choose 3D Step, Image, Text, or Section.
- Fill in the new item, then drag it into the right spot in the procedure if it isn't there already.
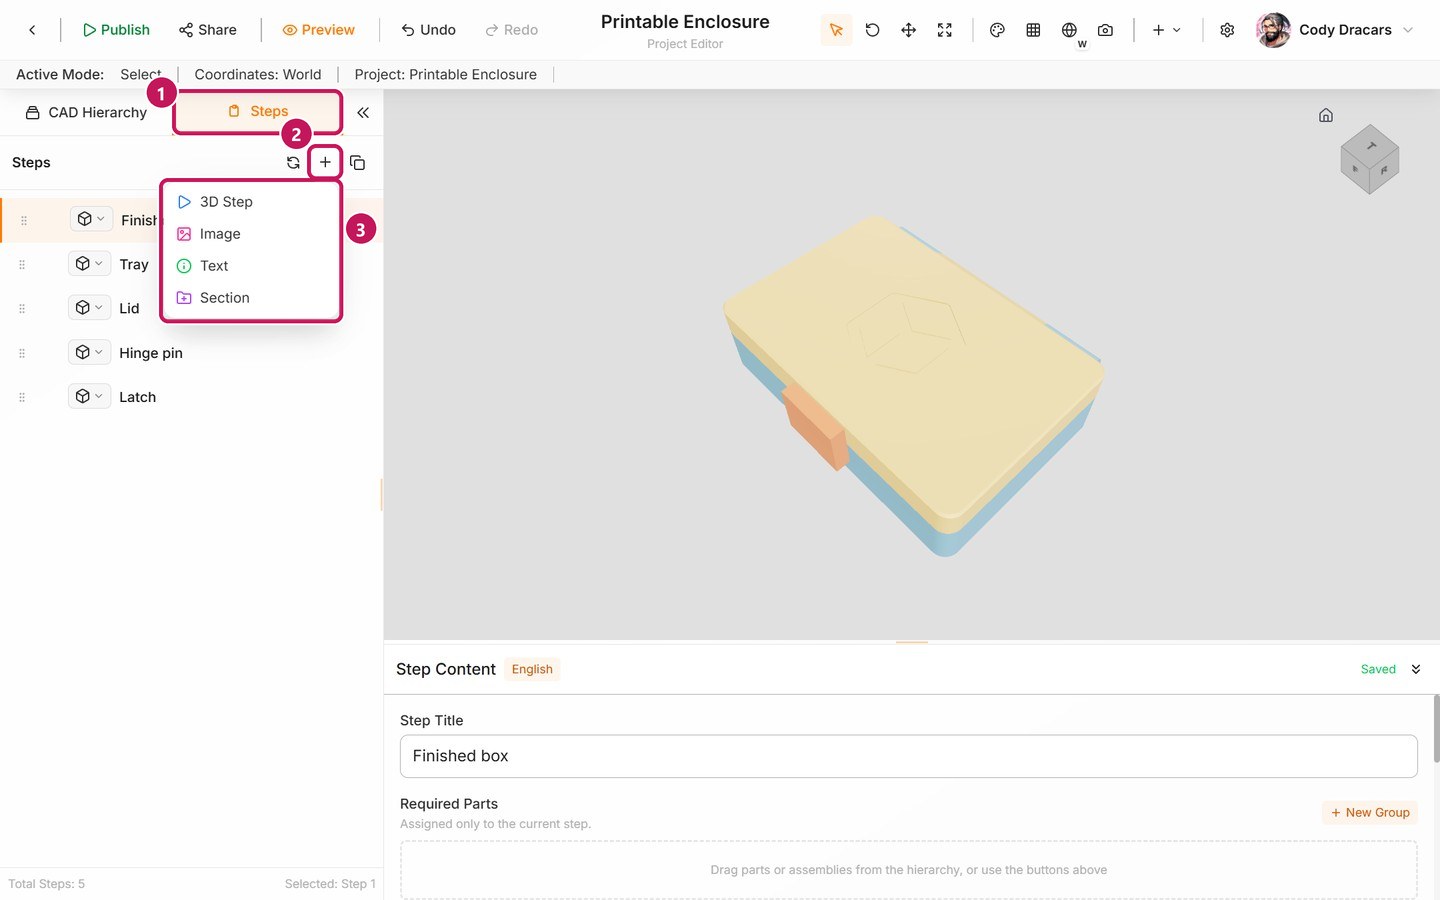
- (1) The Steps tab.
- (2) Add manual item.
- (3) The menu of item types.
See what each item opens
Image
Choose Image when the end user needs a photo, a diagram, a warning, or some other fixed visual. In the editor, you choose an image or video, set how it fits, and pick its background.
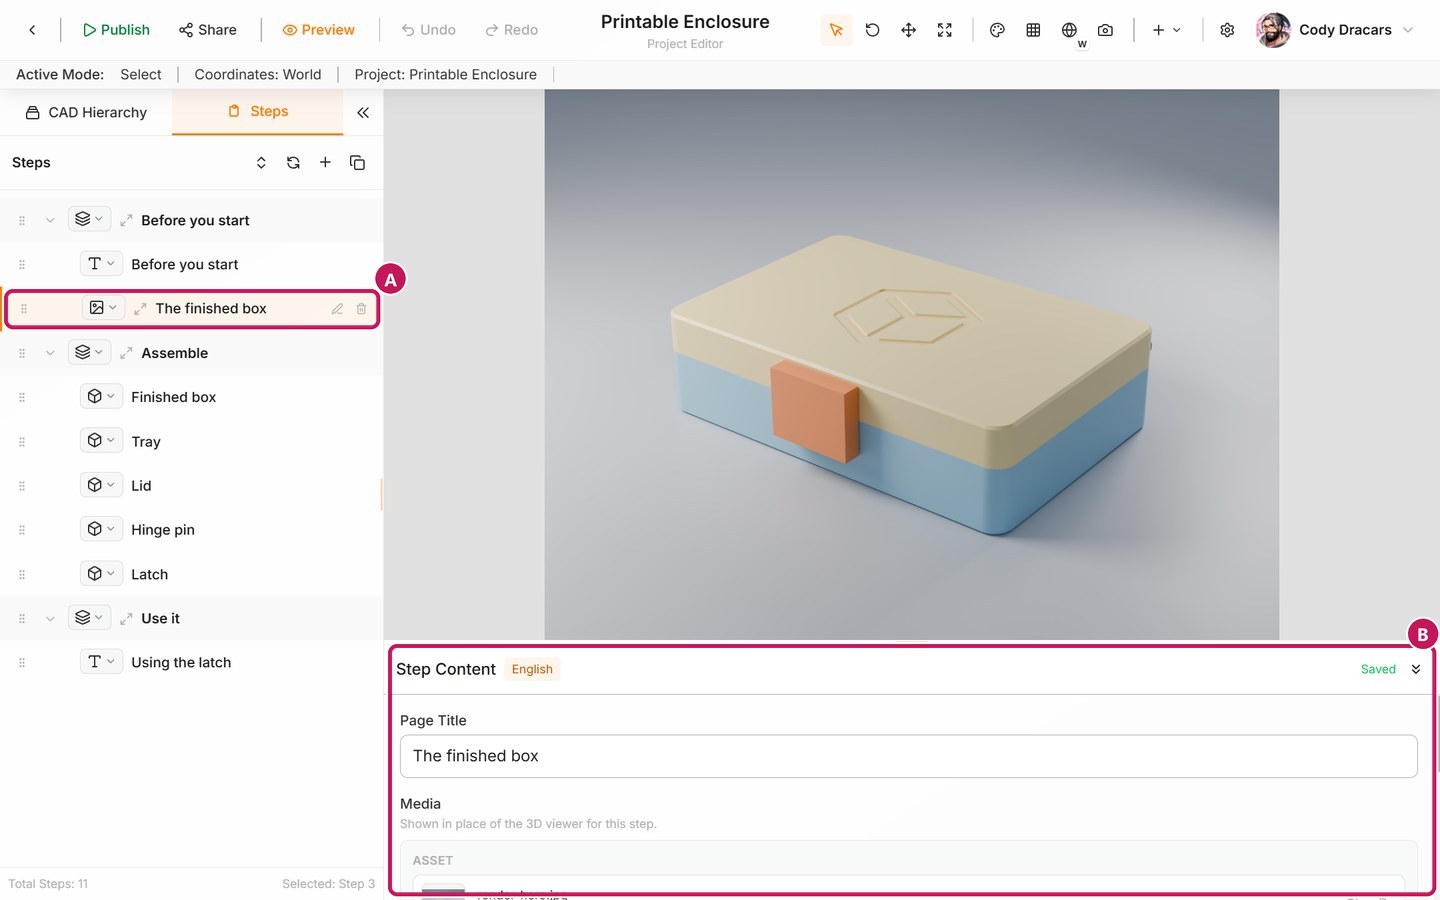
- (A) The Image item in the Steps list.
- (B) Its content panel, starting with the page title and media.
Once you choose a file, it takes the place of the 3D view. Scroll down the panel to find Image Fit (Contain, Cover, or Fill), the Cover option, and the background.
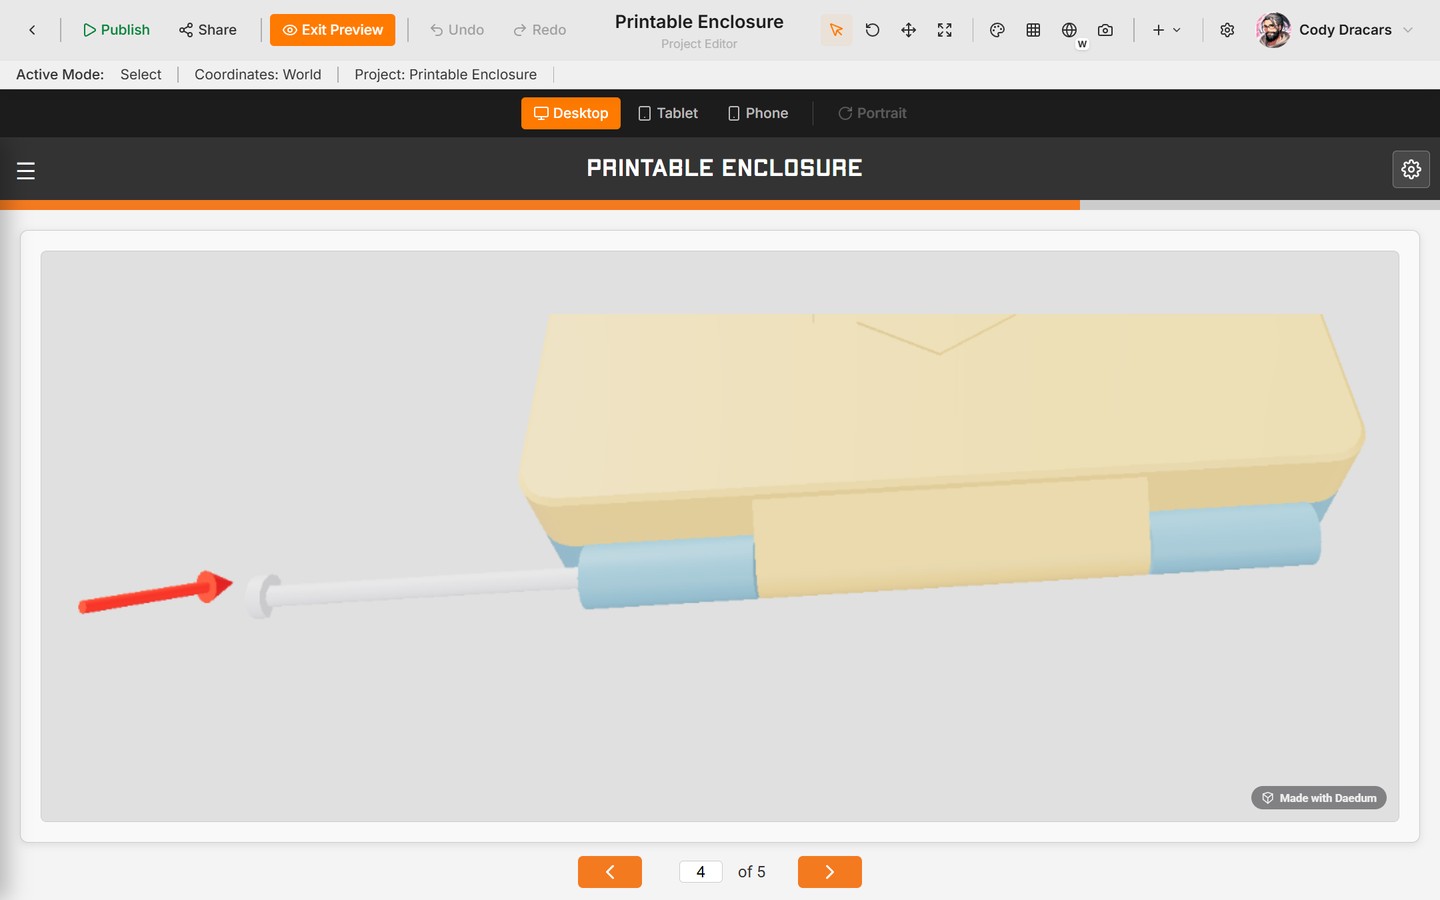
End users see the image fill the frame in place of the 3D view, with the usual step navigation underneath:
Text
Choose Text for an explanation, a safety note, a definition, or a short introduction that doesn't need a 3D view. It has a title and a formatted instruction area, and that's it.
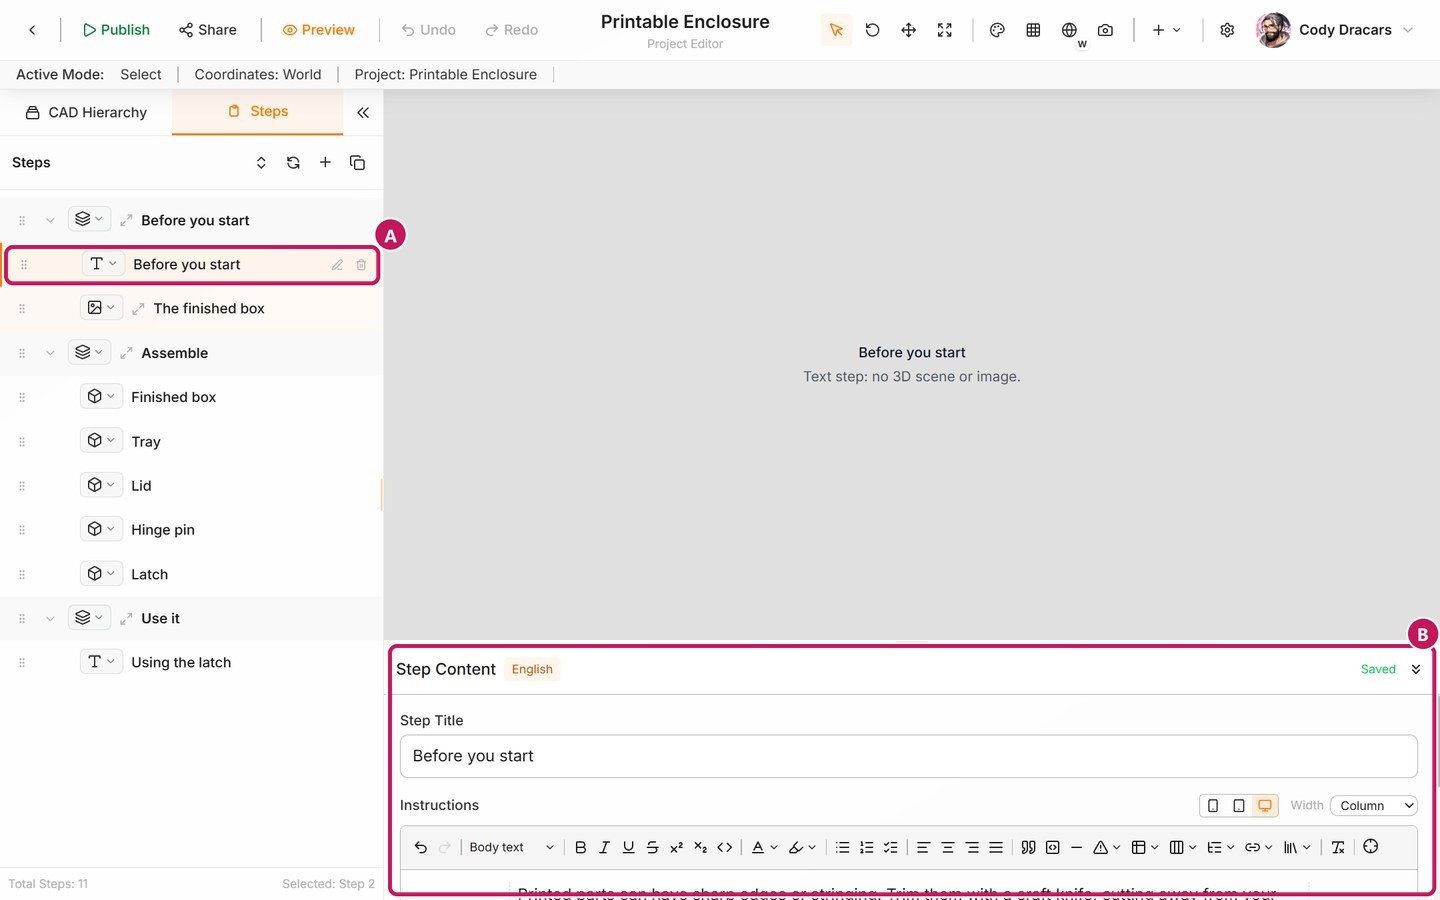
- (A) The Text item in the Steps list.
- (B) Its content panel, with the title and the formatted instruction area.
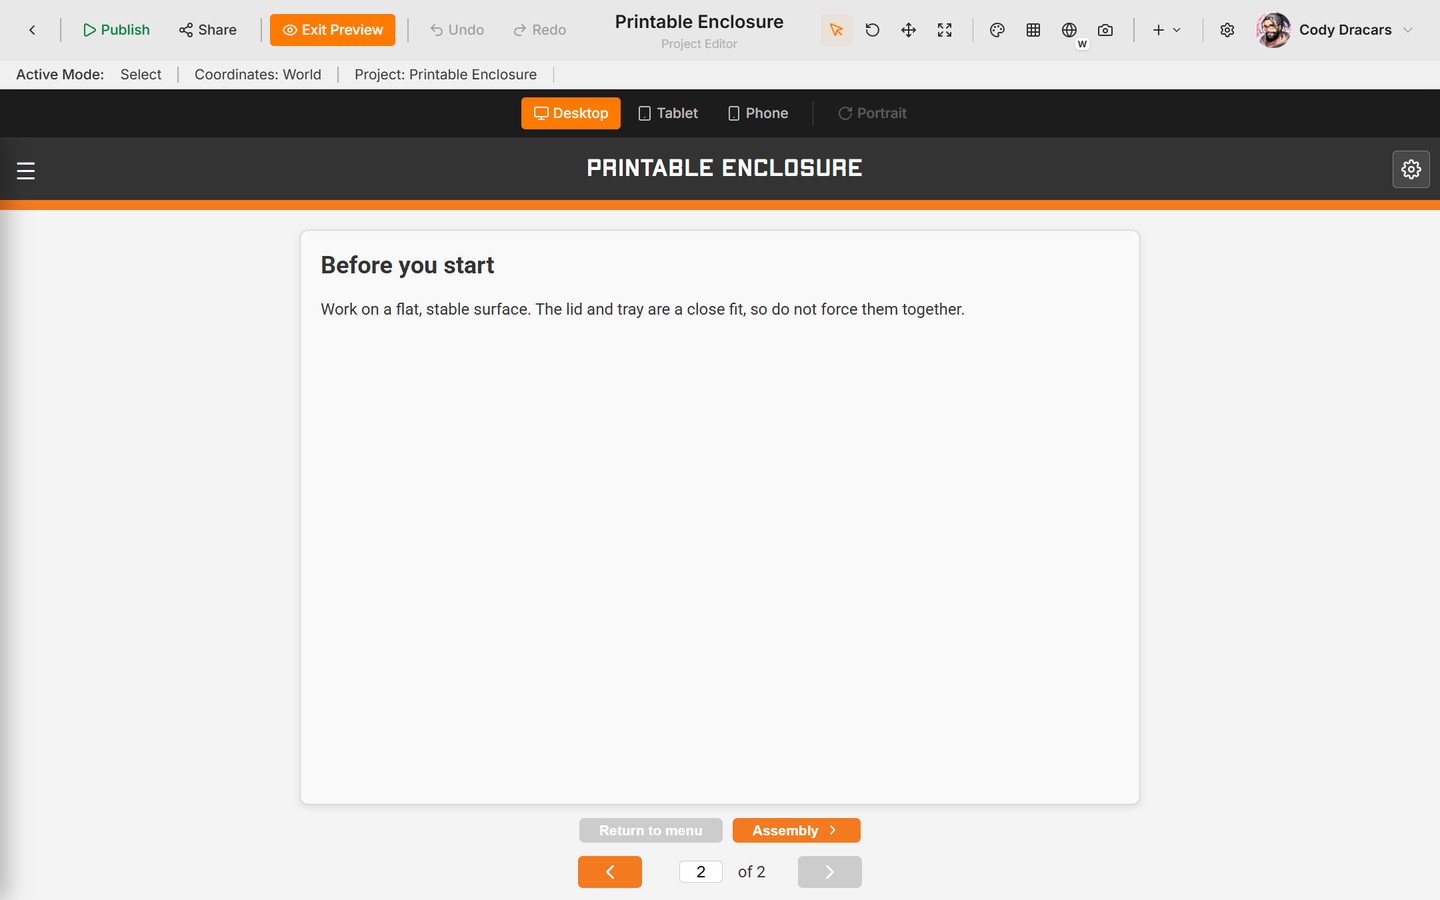
There's no 3D scene or image to set up. End users see a single card with the title and text, and no 3D view:
Section
This is a paid feature. Requires a Professional or Commercial plan. Professional includes up to 6 Sections per manual, and Commercial has no limit. 3D Step, Image, and Text items work on every plan.
Choose Section to group related items into a named phase. Give it a short name and, if you like, a blurb. A section can also have a cover image and its own display options.
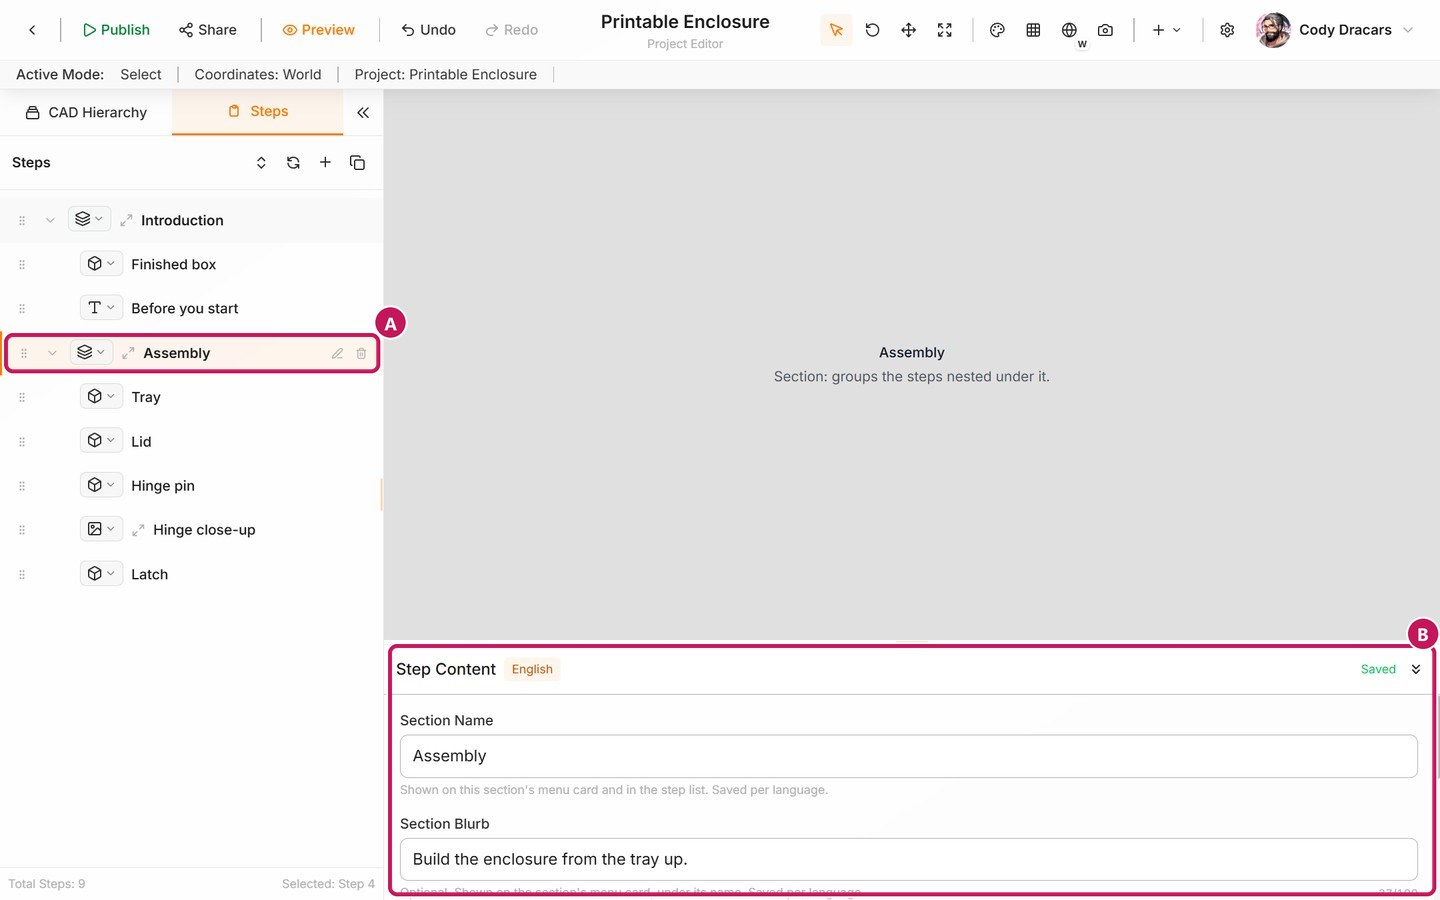
- (A) The Section in the Steps list, with the items below it nested inside.
- (B) Its name and blurb. Scroll down the panel for the cover and options.
New items are always placed directly after the item you have selected. When you add your first Section, Daedum also groups the steps above it into a section called Introduction, so that every step belongs to a section. The steps below the new Section nest inside it. You can rename or remove Introduction like any other section.
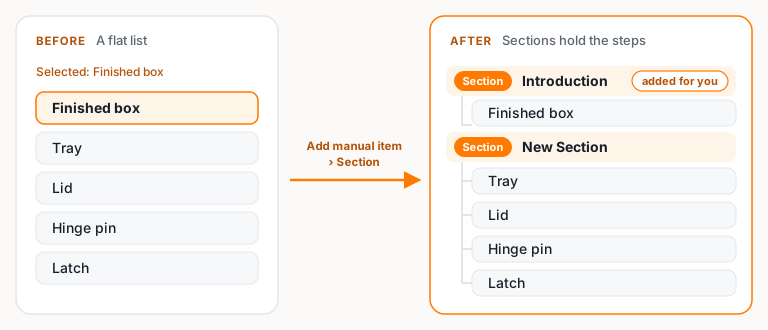
If you delete a Section, only the grouping goes away. Its steps stay put.
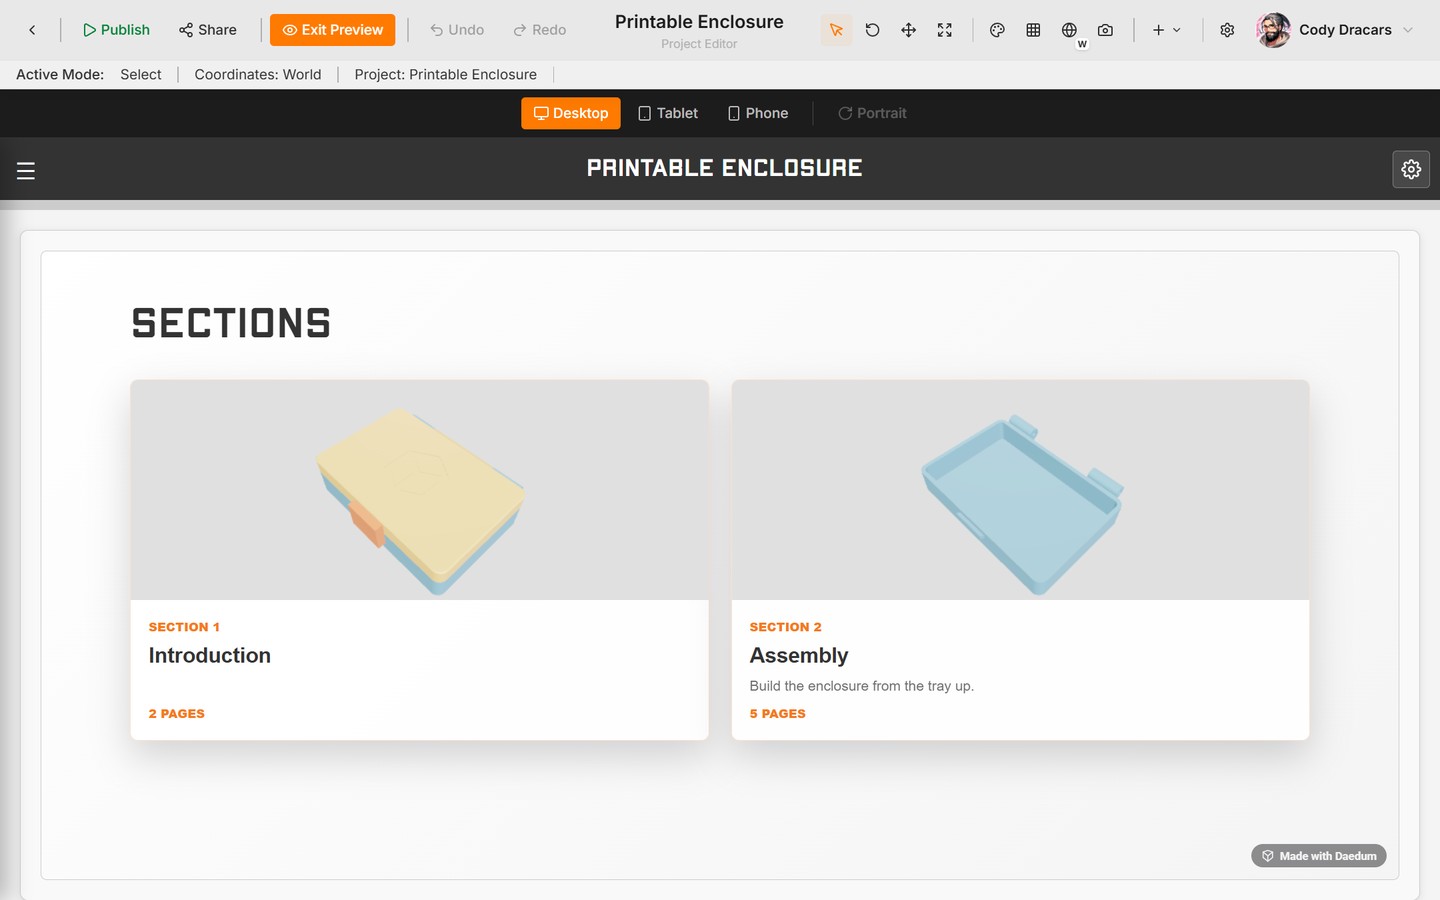
End users get a card for each Section, showing its name, blurb, and page count:
Inside a Section, the step numbers start again from 1. The first and last steps link to the neighbouring Sections and back to the menu:
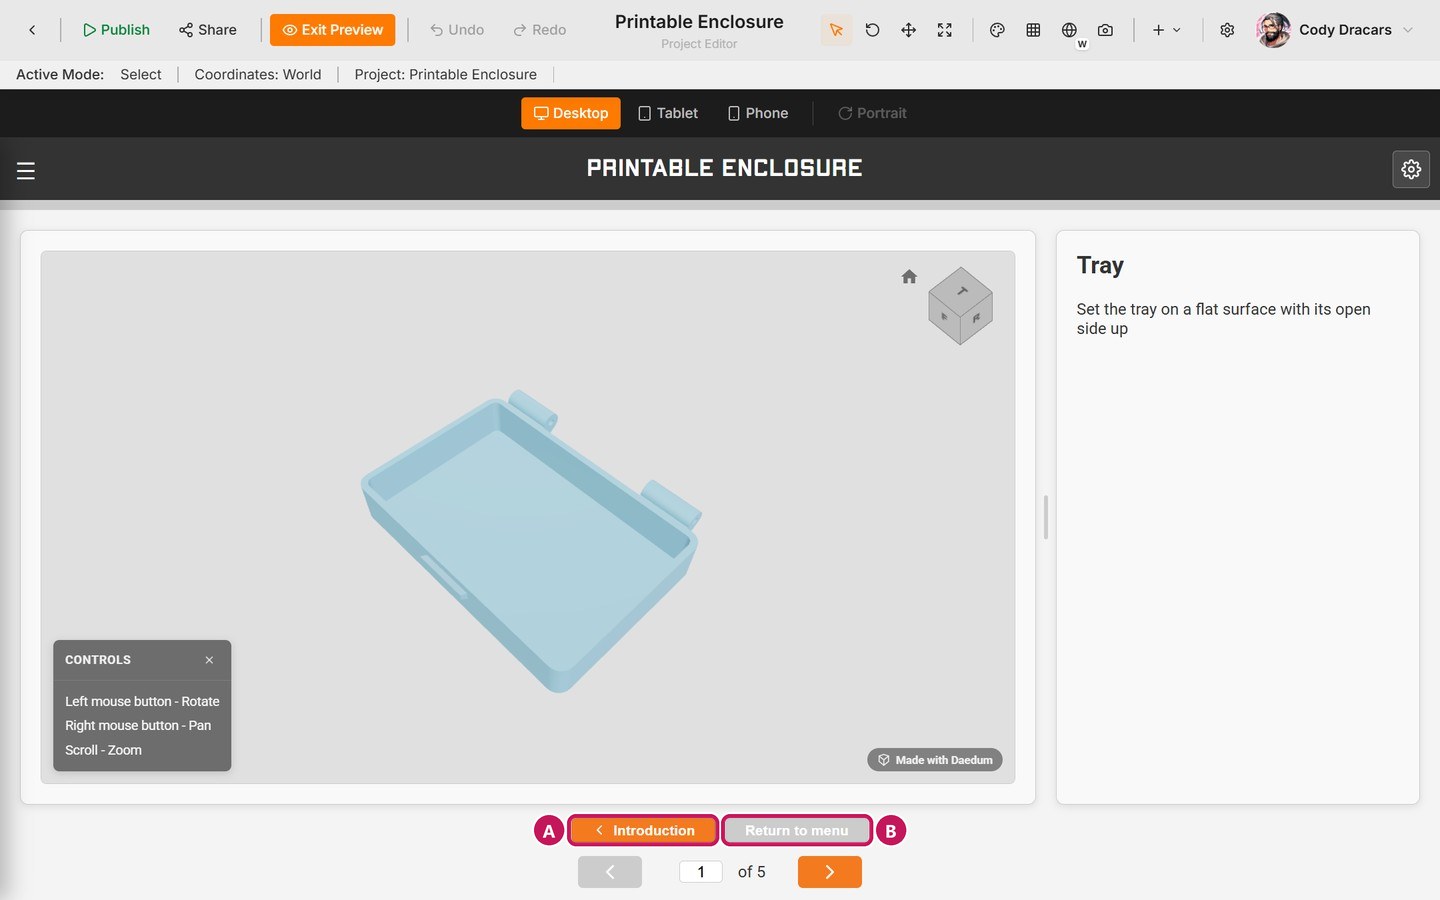
- (A) Goes back to the previous Section.
- (B) Return to menu.
Sections and build options covers the menu settings.
Keep 3D authoring in one place
This page is about choosing the right item type and deciding where supporting content goes. For the full 3D side of things (visibility, camera framing, instructions, required parts, and indicators), head over to 3D steps: visibility, cameras, and moving parts rather than repeating that work here.
Use sections to create orientation
This is a paid feature. Requires a Professional or Commercial plan. Sections are not part of the Hobbyist plan.
Use a Section when it helps the end user to know which phase of the procedure they're starting. Keep section names short, and put the items inside them in the order the work happens.
Good section names describe the phase of the job, not what you're doing in the software:
- Preparation
- Remove the cover
- Install the hinge
- Final inspection
Combine item types deliberately
This example uses Sections, which are a paid feature. Requires a Professional or Commercial plan. On Hobbyist, use the same pattern without the Section items.
Here's what a simple procedure might look like:
- Section: Preparation
- Text: Explain the goal or a safety condition.
- 3D Step: Show the first part and action.
- Image: Add a close-up reference when the 3D view isn't enough.
- Section: Final inspection
- 3D Step: Show the completed assembly.
Once you've mixed in different item types, preview the whole manual. If an item breaks up the end user's flow without adding anything useful, remove it or move it into a separate reference guide.