Features
Sections and build options
Give end users a section menu, or offer several variants of the same manual with the option selector.
Requires a Professional or Commercial plan. Sections are not part of the Hobbyist plan, and the section menu and option selector both work by showing and hiding Sections. Professional includes up to 6 Sections per manual, and Commercial has no limit. See Plans and limits for what each plan includes.
- Audience: Authors whose manual has more than one Section, or covers more than one version of a build.
- Before you begin: The manual has at least one Section (see Step types: 3D, Image, Text, and Section).
- Starting point: The editor is open.
- End result: A section menu and, if you need one, a working option selector.
Open Sections & Options
Select Settings in the editor toolbar, then choose the Sections & Options tab. It has three parts:
- The section menu.
- The option selector.
- Label translations for both, once the manual has more than one language.
The section menu
Each Section reads like its own small manual, with its own step numbering. The section menu is the hub an end user picks a section from, and comes back to when they're done.
Turn on Show section menu page to open the manual on a menu of section cards, instead of dropping the end user straight into the first step. With that on, you can also:
- Turn on Show "back to menu" button, which adds a button next to the section links on the first and last step of each section.
- Set a Menu page title.
- Set the Back to menu button label.
A section's own name, blurb, and cover image aren't set here. They live on the Section item itself in Step Content (see Step types: 3D, Image, Text, and Section). Links to the previous and next section always show at the edges of a section, whatever this setting is.
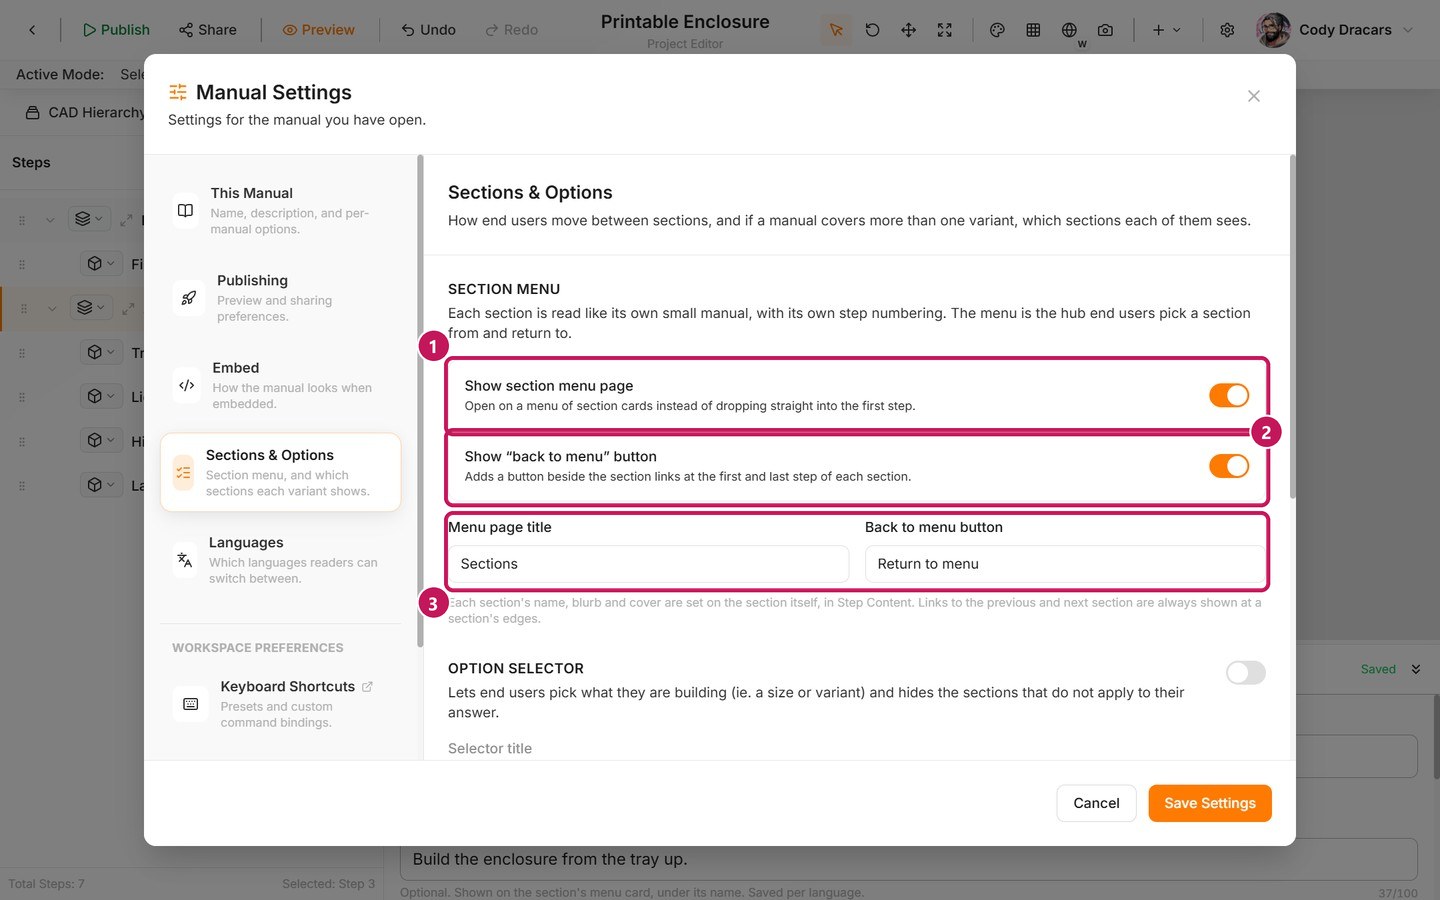
- (1) Turns the menu page on or off.
- (2) Turns the back-to-menu button on or off.
- (3) Sets the wording for both.
The option selector
The option selector is for when one manual covers more than one version of a build, like a small and a large enclosure, or a product that comes in different colors. It lets the end user pick what they're building, then hides the Sections that don't apply to them.
Turn on Show option selector in embed and give it a Selector title. Then decide what happens before a reader chooses:
- Open with a default: the manual opens straight away, using each group's default choice. End users can change it afterwards in the embed's own settings.
- Ask before opening: the end user picks first, and the manual opens based on their answer. Use this when a wrong guess would show them the wrong build.
While the selector is off, every Section is shown to every end user, and the assignments below don't do anything.
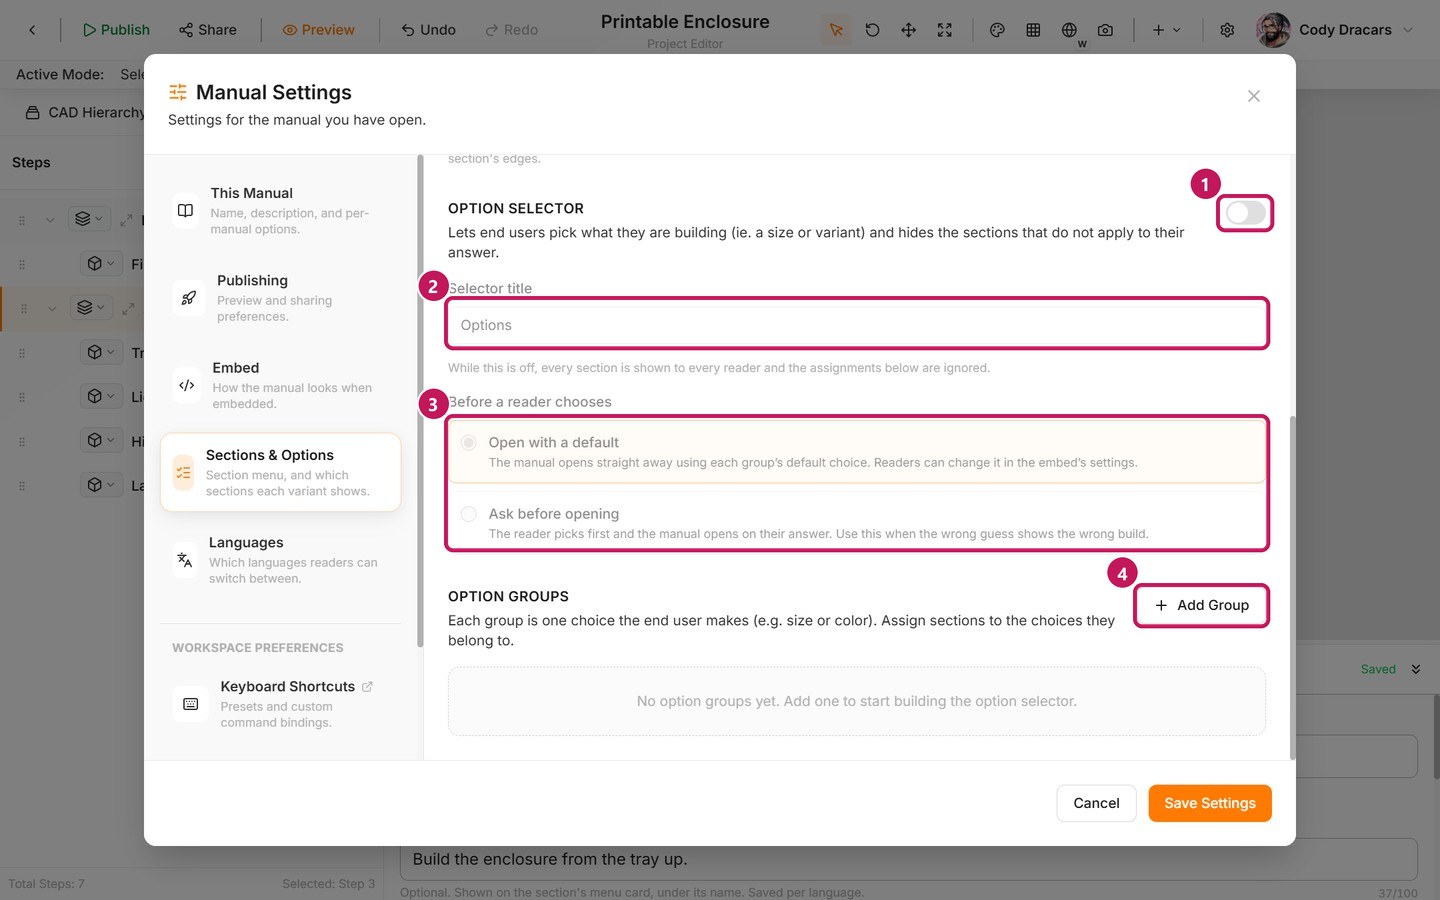
- (1) The switch that turns the selector on.
- (2) Selector title, which names it.
- (3) The before a reader chooses setting, which decides how the manual opens.
- (4) Add Group, which starts your first option group.
Option groups
An option group is one choice an end user makes, such as size or color. Select Add Group, give it a name, then add its choices (for example, "Small" and "Large").
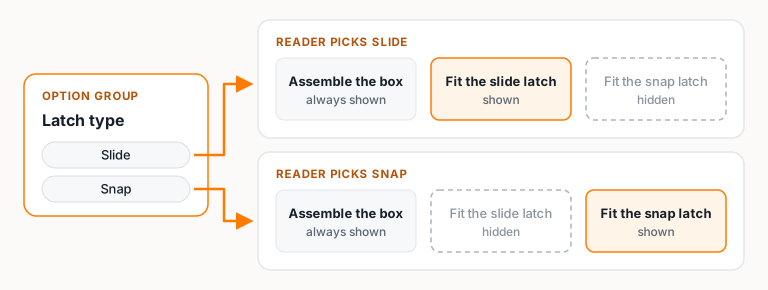
For each choice, use Section Visibility to tick the Sections that apply to it. If you leave a Section unticked everywhere, it's always shown, no matter what the end user picked. If Before a reader chooses is set to "Open with a default," don't forget to set a Default choice for the group too.
Here's an example. A Printable Enclosure manual covering both a slide latch and a snap latch could have one group ("Latch type") with two choices ("Slide" and "Snap"). Each choice shows its own "Fit the latch" Section, and they share every other Section.
Translate the selector and menu
Once the manual has more than one language (see Languages), a Label Translations area appears here. It only covers the labels that live in these settings:
- The selector title.
- The menu page title.
- The back-to-menu button.
- Each group and choice label.
Work through them one language tab at a time. Leave a field blank to keep the default-language wording. Step instructions aren't translated here; you translate those on the steps themselves.