Features
Publish, version, and embed
Publish a version of your manual, share its public address, embed it on your website, and control which versions end users see.
Some features on this page are paid. They are marked with a notice like this one right under their heading, so you can tell what works on the Hobbyist plan and what needs an upgrade. See Plans and limits for what each plan includes.
- Audience: Authors ready to release a manual to end users.
- Before you begin: The working manual is complete enough to preview from start to finish.
- Starting point: The editor is open and Publish is available.
- End result: A published version that end users can reach with a public link or embed code.
Treat publishing as a release
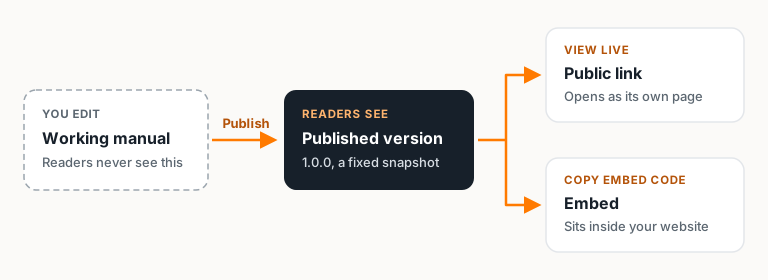
Publishing creates the version of the manual that end users actually see. You can keep editing the working manual afterwards whenever you need to make changes, and publish again once those changes are ready for end users.
Publish a version
Always preview first. Make sure the steps are in the right order, each view is easy to follow, and an end user can get through the whole procedure. Pay extra attention to:
- The first step.
- The order of your sections.
- Views that focus on part of the assembly.
- Any text that mentions a part by name.
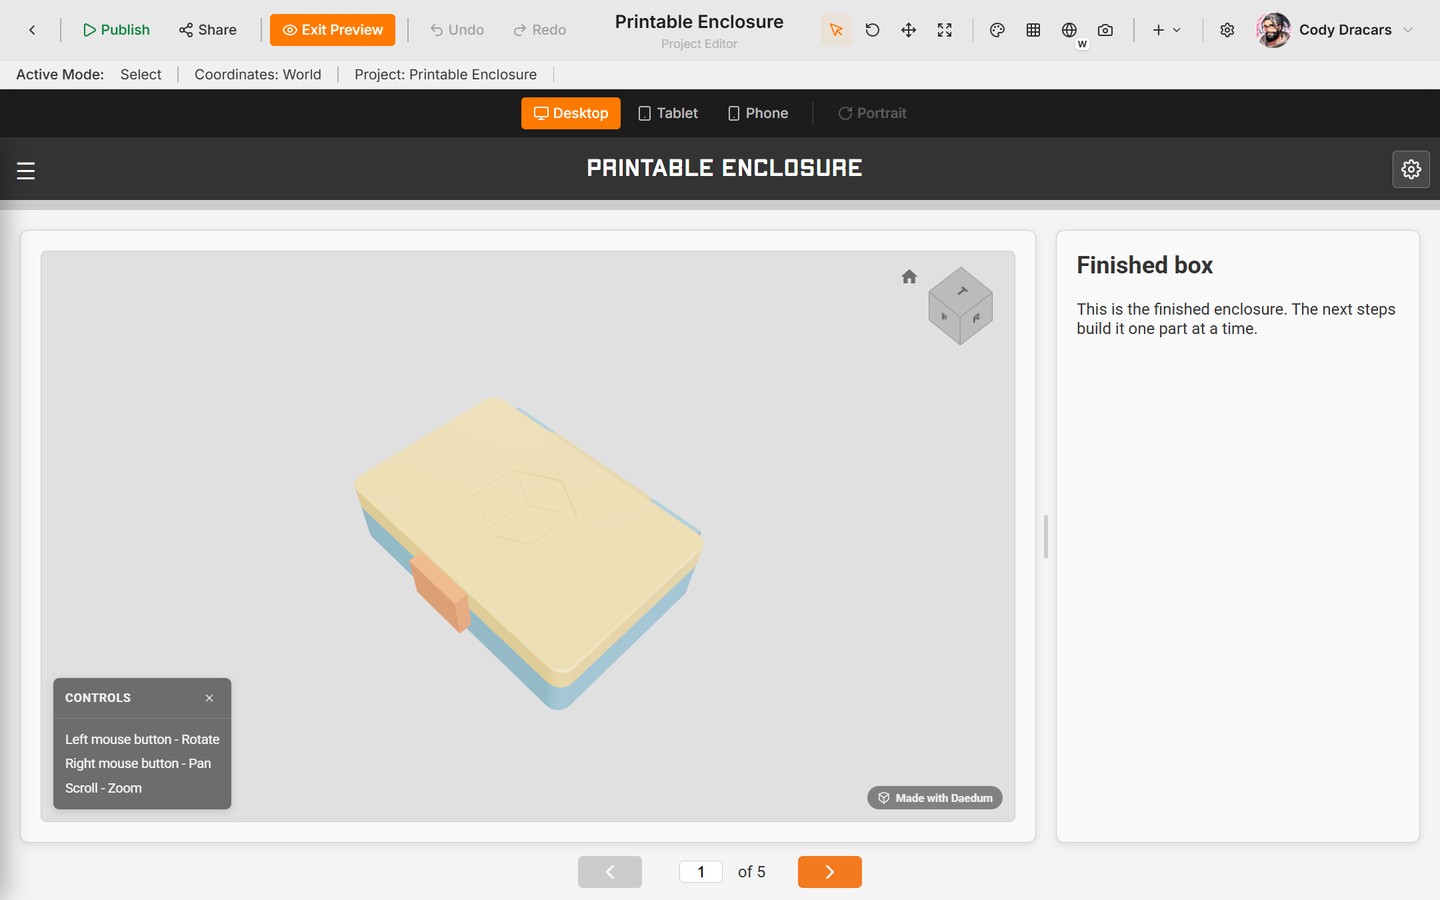
When you're happy with it, select Publish in the editor toolbar (Ctrl+Alt+Shift+P). Check the version number, add private release notes if they'll help you recognize this release later, and confirm.
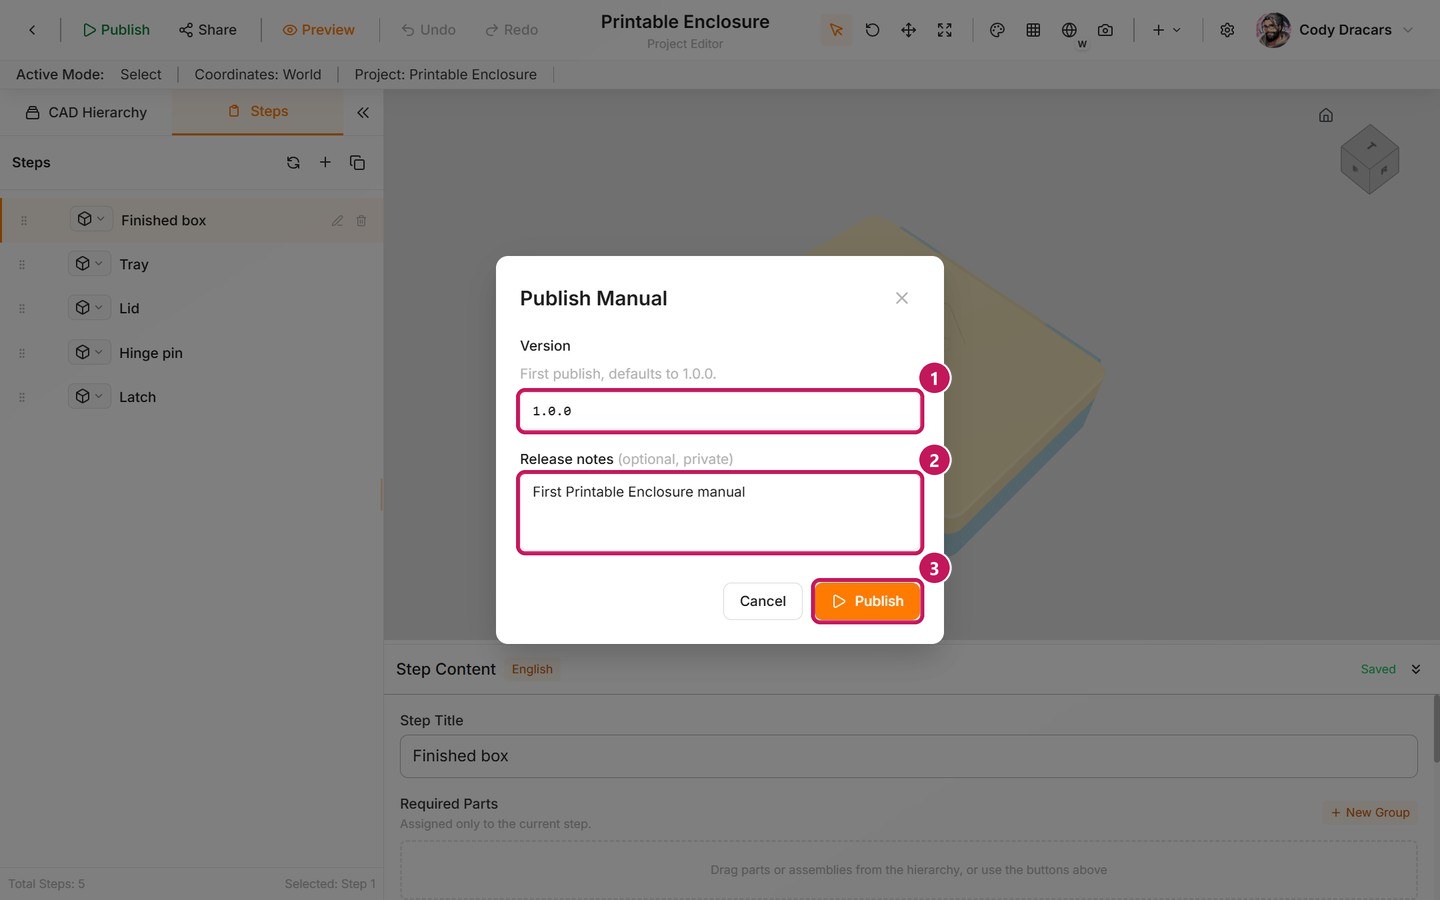
- (1) Check the version.
- (2) Add release notes, if you want them.
- (3) Select Publish.
The first version defaults to 1.0.0, and that's the only field the dialog shows. For later versions, it also offers patch, minor, and major choices. Unless you already follow your own release convention, just keep the suggested version.
Put simply: publish your first complete manual as 1.0.0, then publish a new version whenever the content end users see changes.
Find the published result
After publishing, go back to the manual page and open the Publishing panel. It has the public manual address, View live, and Copy embed code.
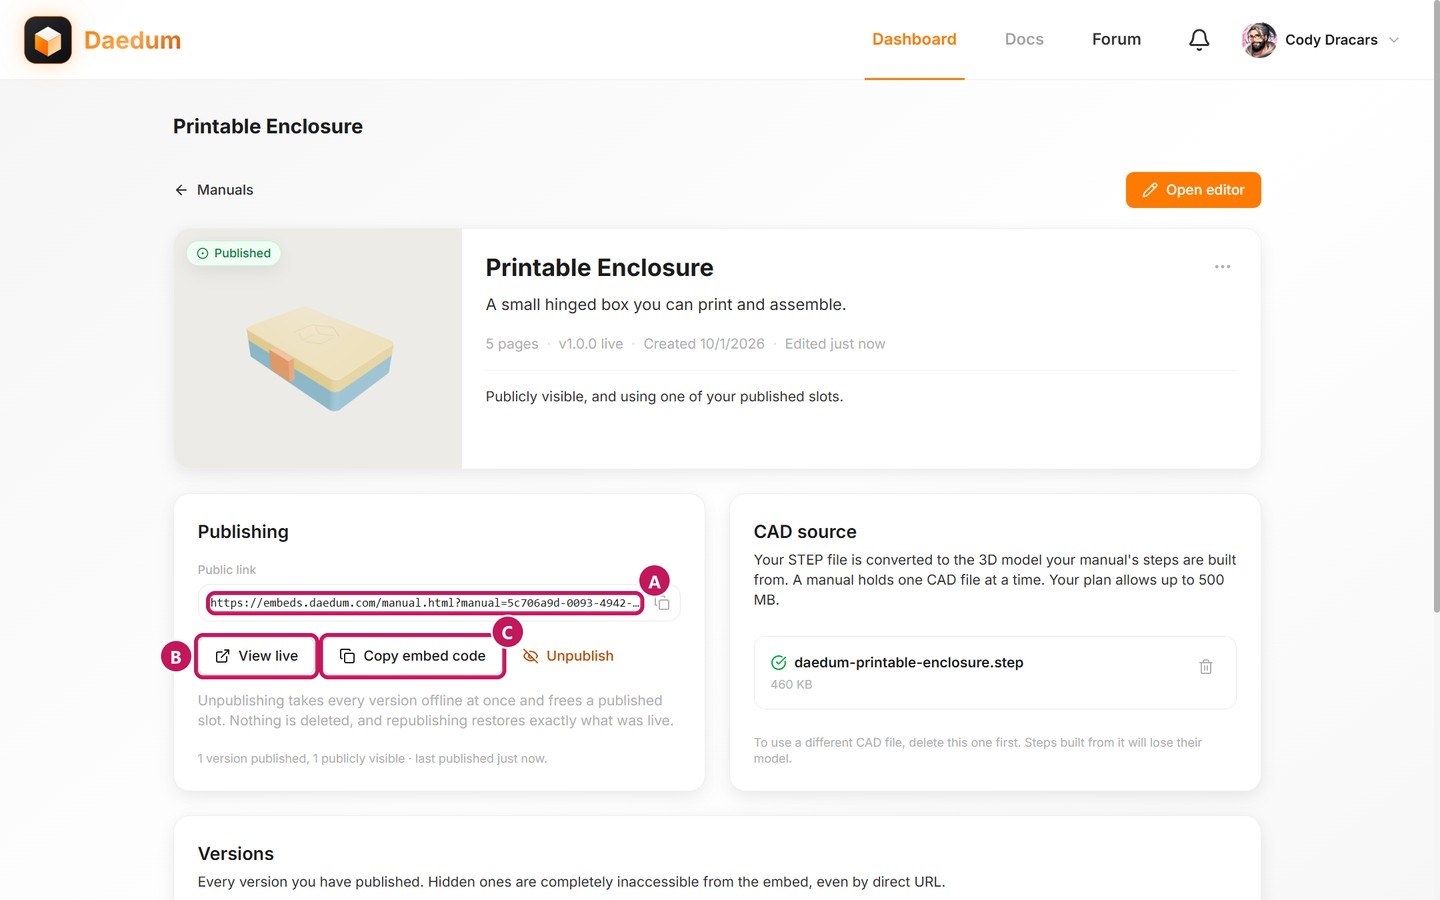
- (A) The public manual address.
- (B) View live.
- (C) Copy embed code.
Unpublish takes every version offline again, without deleting anything.
Use View live to check exactly what end users get. Use the public address when you want a link that lasts, or copy the embed code when the manual should sit inside another website.
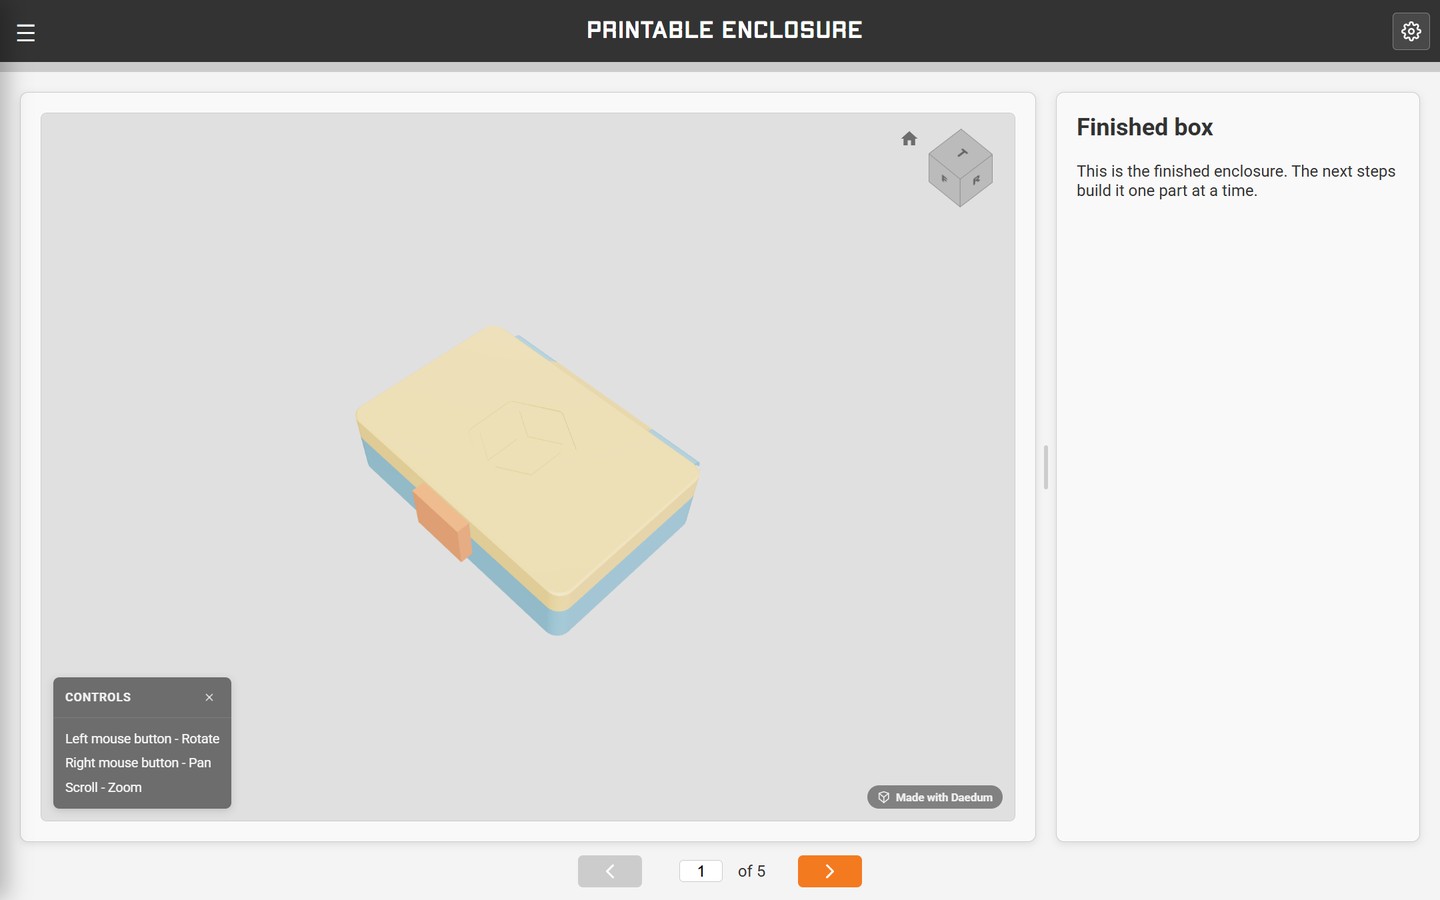
The public address is how you hand the manual to an end user, and the embed code is how you hand it to another website. Test both from the Publishing panel before you send either one to a customer or teammate.
Give the manual a readable address
Part of this is paid. A generated readable address works on every plan. Choosing your own wording needs a Professional or Commercial plan.
Every manual can always be reached at its ID. A readable address gives it a second, friendlier link that someone can read out loud, print on a box, or put in a QR code.
- Open Settings, then the Publishing tab.
- Under Manual address, select Turn on a readable address. Daedum builds the address from the manual's name, such as
printable-enclosure-5c70. The characters at the end of yours will be different. - On Professional and up, you can pick the wording yourself instead: type it into Choose your own and select Use this.
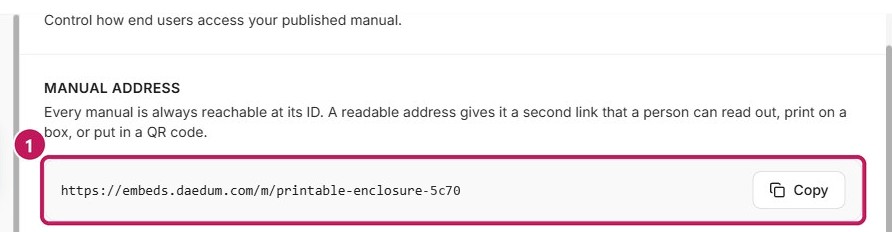
- (1) Your readable address:
https://embeds.daedum.com/m/followed by the readable name.
The new address works straight away, no publish needed. The ID link keeps working too, and so does every readable address the manual has ever had, so links you have already shared never break. If you ever want to go back, Use the ID only turns the readable address off again.
Brand your embed
Some of these settings are paid. Theme and Part Cards Panel work on every plan. Logo and Embed colors need a Professional or Commercial plan. The page background and text colors, hiding the badge, the browser tab title and icon, and a custom loading animation need a Commercial plan.
Select Settings › Embed to control how the embed looks to end users, separately from the manual's content:
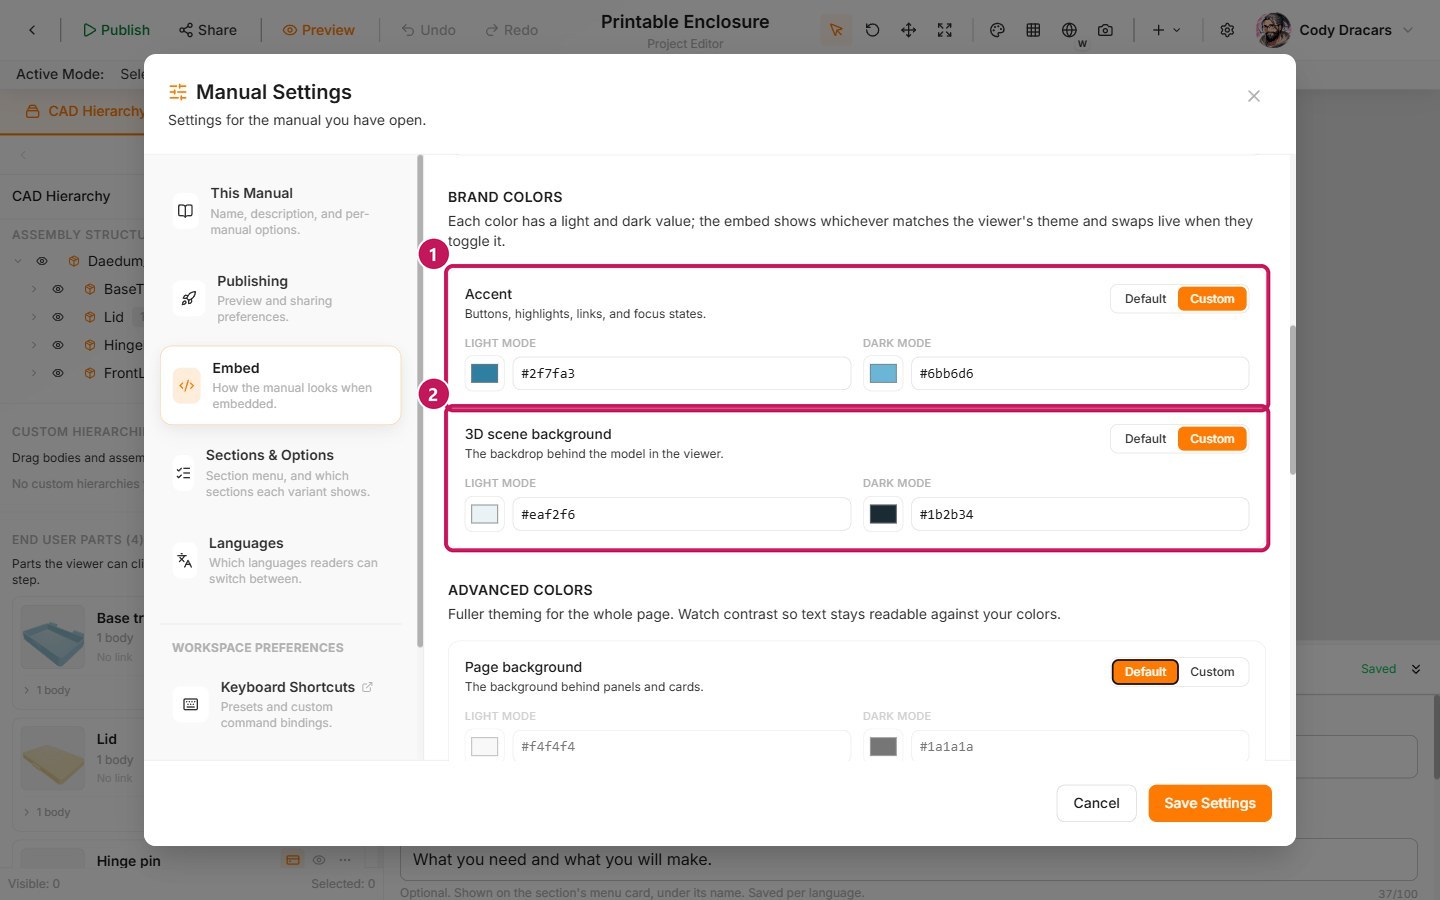
- (1) The accent color.
- (2) The 3D scene background.
Here's what each setting does:
- Theme: By default, the embed follows the theme of the website around it (when you add the small companion script), and otherwise follows the end user's device. You can set the manual to Light mode or Dark mode by default instead. Turn off Let readers switch theme to lock the manual to one.
- Part Cards Panel: Adds a Part Cards entry to the end-user view's navigation, listing every part card. It's off until you turn it on. See Parts, part cards, and EasyPrint.
- Logo: Shows your account logo, a logo just for this manual, or none at all. Professional and up.
- Embed colors: Professional can set the accent and 3D scene background colors. Commercial adds the page background and text, so nothing about it reads as a Daedum page.
- "Made with Daedum" badge: Shown on every plan below Commercial. Commercial hides it by default, with the option to turn it back on.
- Browser tab title and icon: Commercial can set the tab's title and favicon. Every other plan shows the Daedum name and icon alongside the project.
- Custom loading animation: Commercial can replace the loading indicator with a Lottie file, SVG, or image, for the whole account or just one manual. Every other plan shows the standard Daedum indicator.
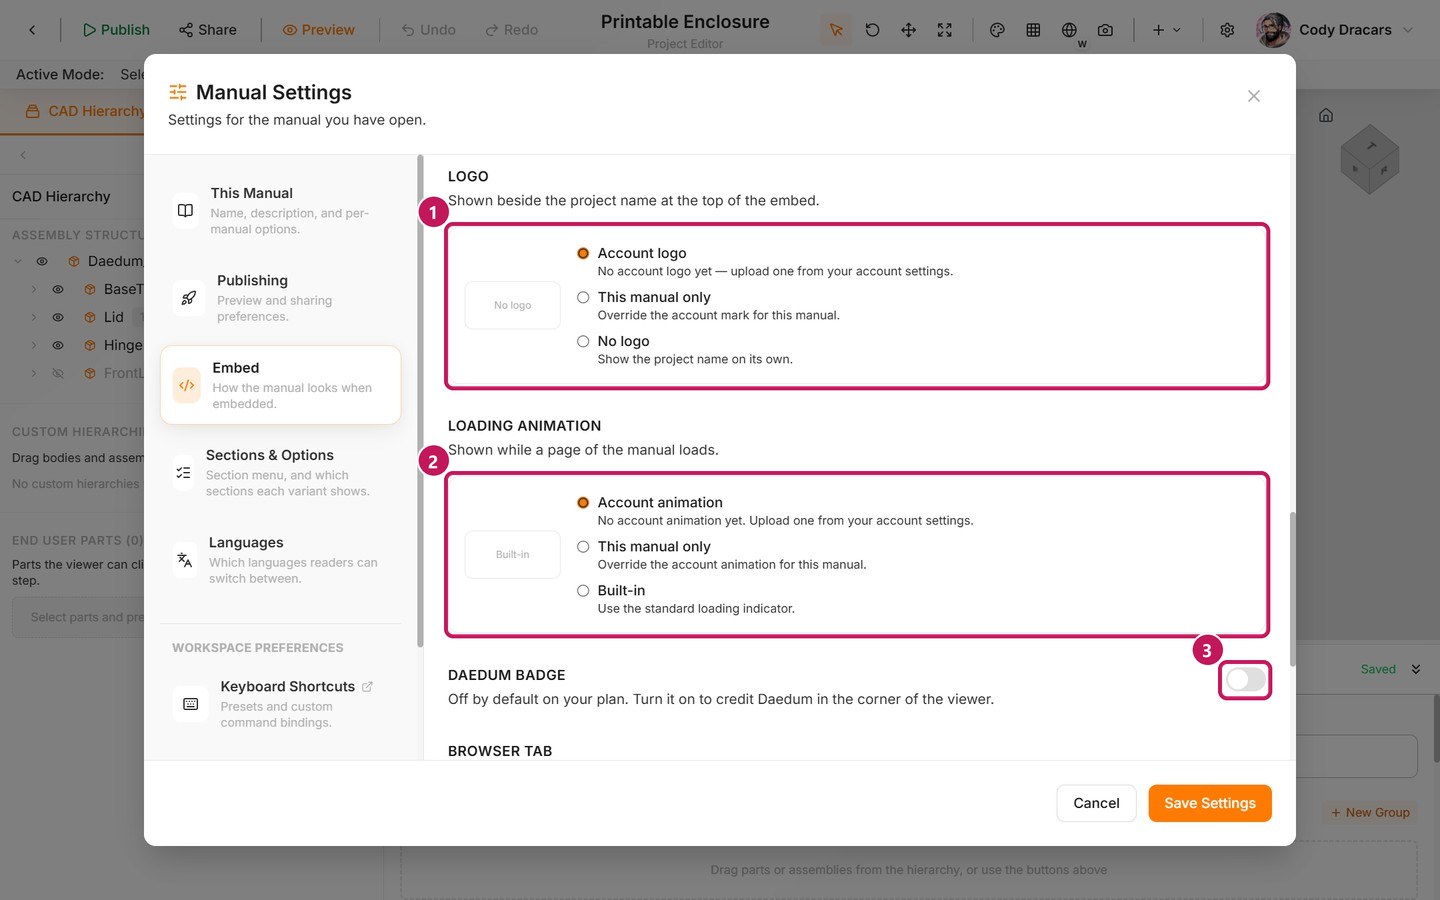
- (1) The logo options.
- (2) The loading animation.
- (3) The Daedum badge switch.
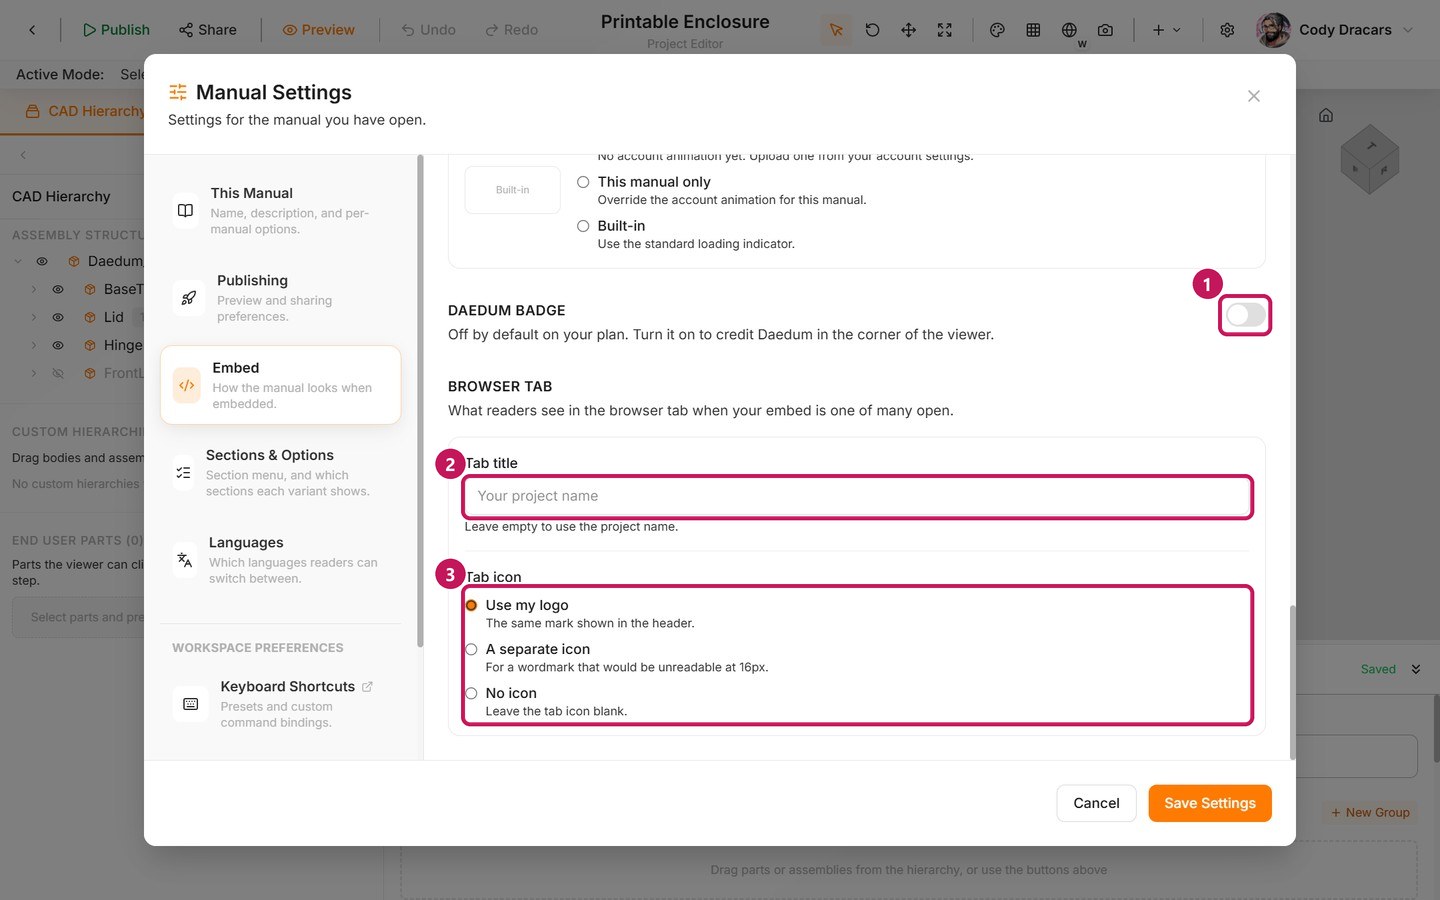
- (1) The Daedum badge switch.
- (2) The browser tab title.
- (3) The tab icon options.
If you ever downgrade, don't worry: your branding is never deleted. It just falls back to what the new plan covers, and comes back as soon as you upgrade again.
Manage versions and visibility
Hiding a single version is a paid feature. Requires a Commercial plan. The version selector, default version, and Unpublish work on every plan.
The Publishing settings show which versions of the manual are available, and which one is shown by default. You can hide a version without deleting the working manual. Keep in mind that if every visible version is hidden, end users can't reach the public manual until you show one again.
Be careful with unpublish and republish. They change what end users can access right away, while editing the manual only changes what goes into a future version.
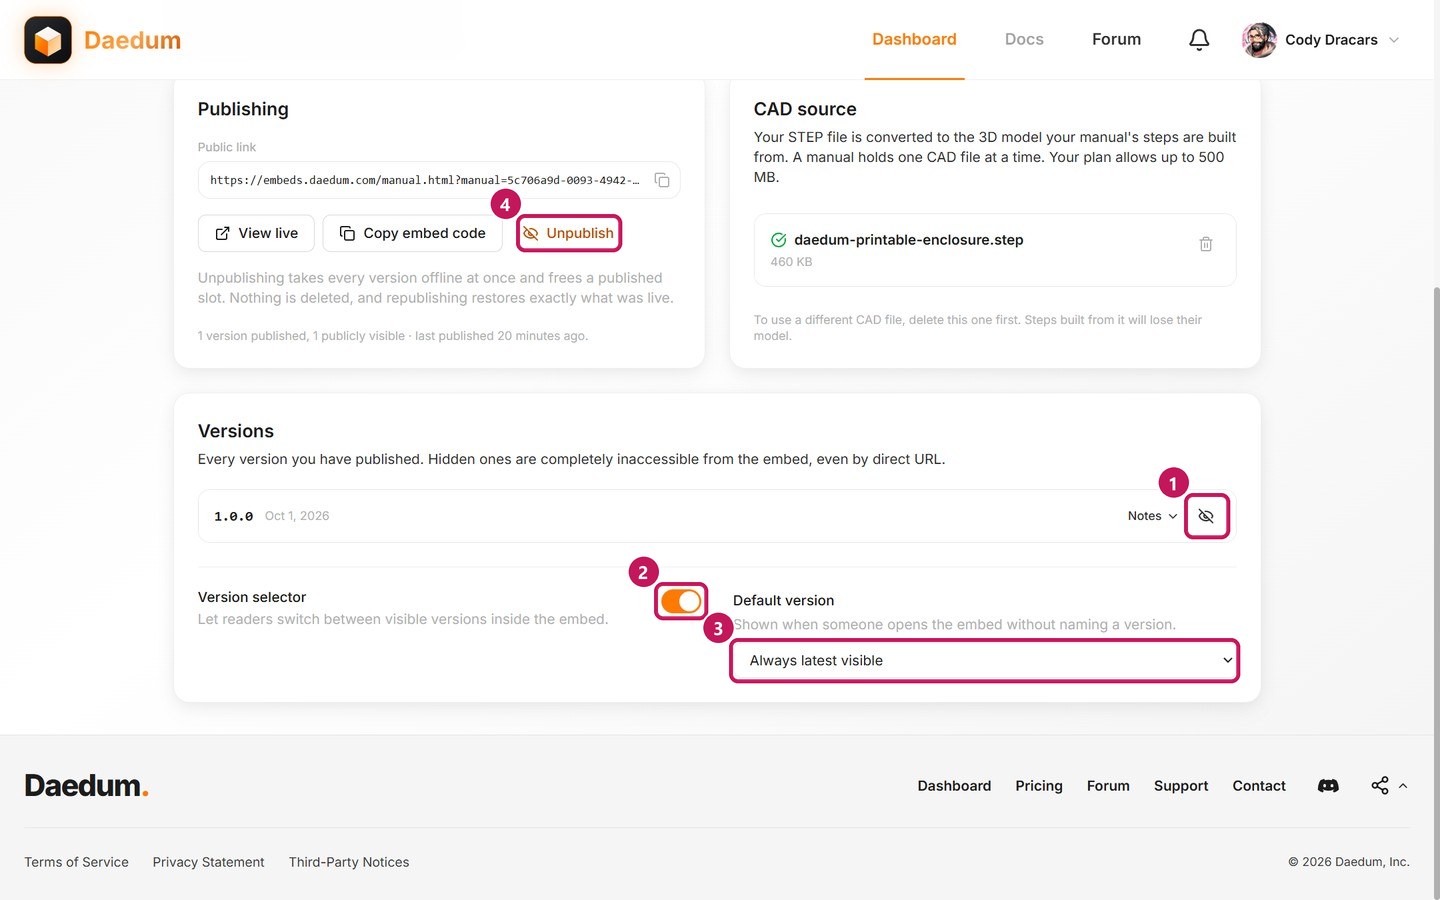
- (1) The eye control hides a version.
- (2) The Version selector lets end users switch between visible versions.
- (3) Default version picks what opens when the address doesn't name a version.
- (4) Unpublish takes every version offline at once, without deleting anything.
If publishing is blocked, see Troubleshooting.